 Save to Pinterest
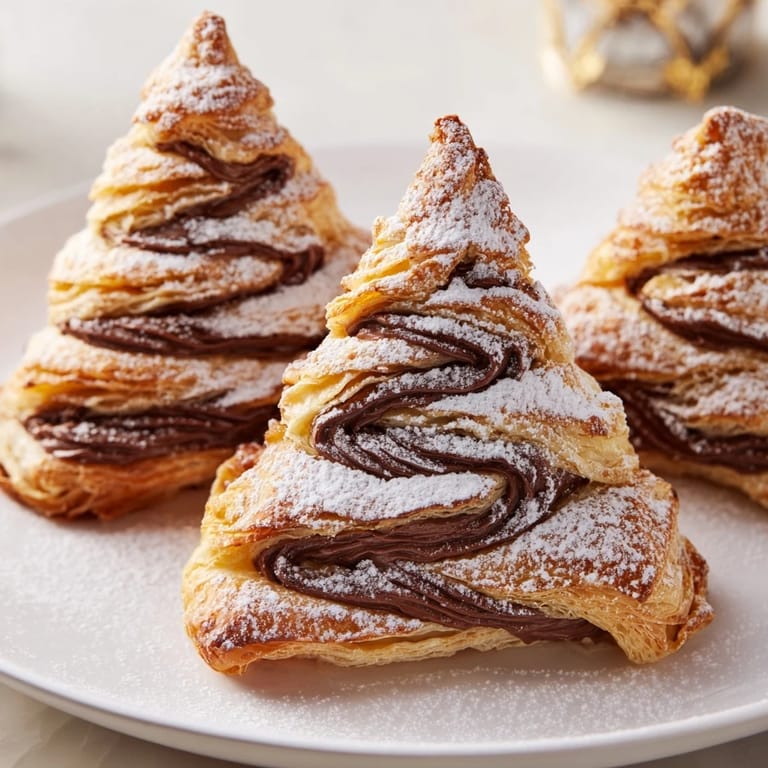
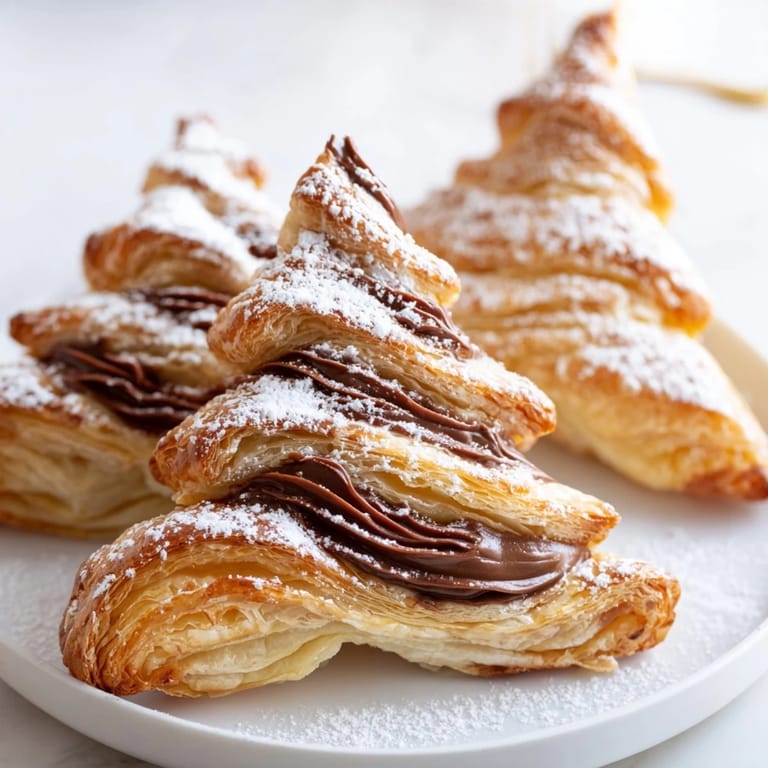
 Last Christmas Eve I found myself in a tiny kitchen in Brussels with snow falling outside the window. My host grandmother pulled out these Nutella pastry trees and my entire conception of holiday treats shifted. They were gone in minutes and I have made them every December since.
I once made fifty of these for a school bake sale and learned the hard way that children will literally grab them off the cooling rack. Now I always double the batch because they disappear faster than cookies or cupcakes. Something about that spiral of chocolate visible through the flaky layers makes them irresistible.
Ingredients
- Puff pastry sheets: Thaw these in the refrigerator overnight not on the counter to prevent the butter layers from melting and losing that signature rise
- Nutella: Warm it slightly for 15 seconds in the microwave so it spreads evenly without tearing the delicate pastry dough
- Egg: Beat the egg with a pinch of salt for a deeper golden color and more glossy finish on the baked pastry
- Powdered sugar: Dust through a fine mesh sieve immediately after baking for that snow dusted look that makes these trees feel complete
Tired of Takeout? 🥡
Get 10 meals you can make faster than delivery arrives. Seriously.
One email. No spam. Unsubscribe anytime.
Instructions
- Prep your oven and workspace:
- Set the oven to 200°C with a rack in the center position and line a large baking sheet with parchment paper so nothing sticks
- Create the chocolate sandwich:
- Unroll one pastry sheet keep it on its paper then spread the Nutella in a thin layer leaving a bare centimeter border around all edges
- Seal the layers:
- Place the second pastry sheet directly on top and gently press the edges together with your fingers to lock the filling inside
- Cut your tree shapes:
- Use a sharp knife to cut 12 to 15 cm tall triangles or press a tree cutter into the dough and carefully lift out each shape
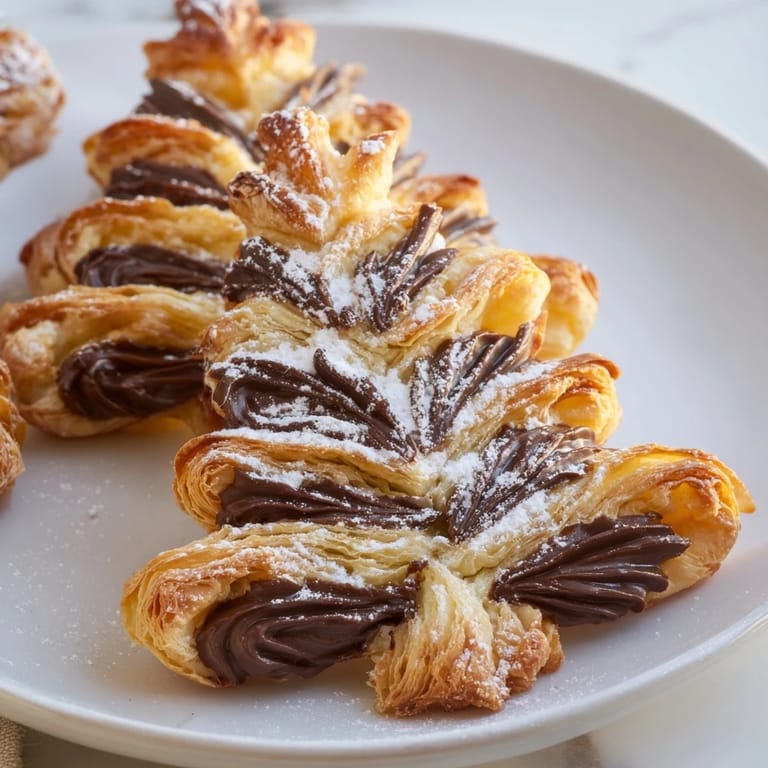
- Form the branches:
- Cut horizontal slits along both sides of each tree stopping before the center trunk then twist each strip away from you one full turn
- Add the golden finish:
- Brush each pastry lightly with beaten egg using a pastry brush taking care not to drip excess onto the parchment
- Bake until puffed:
- Slide the tray into the oven for 16 to 18 minutes until the trees are deep golden and the twisted branches have puffed into beautiful spirals
- Finish and serve:
- Let them cool for just 5 minutes on the tray then shower with powdered sugar and serve while still slightly warm
 Save to Pinterest
 My daughter now requests these for her birthday instead of cake. We make them together and she has developed her own technique for extra dramatic twists. There is something special about standing side by side in a flour dusted kitchen passing down the simplest kind of tradition.
Making These Ahead
You can assemble and cut the trees up to 24 hours in advance then freeze them flat on a parchment lined baking tray. Bake directly from frozen adding 2 to 3 extra minutes. The frozen pastry actually puffs even better creating the most spectacular layers.
Troubleshooting Common Issues
If your branches lose their twist during baking you probably cut the slits too close to the edge of the triangle. Next time keep the cuts more centered and leave more dough between the trunk and the first cut. Pale pastry means your oven temperature was too low or you opened the door too early.
Serving Ideas
These shine brightest on a dessert board surrounded by fresh berries and small bowls of extra Nutella for dipping. I have also served them alongside espresso after dinner drinks and they disappear just as quickly as with kids.
- Arrange them on a platter in a circle like a tiny forest with rosemary sprigs tucked between
- Pair with vanilla ice cream for a hot and cold dessert experience
- Offer flaky sea salt on the side for guests who love that sweet salty contrast
 Save to Pinterest
 These trees have become the moment when our holiday season truly begins. I hope they bring that same spark of joy and anticipation to your kitchen.