 Save to Pinterest
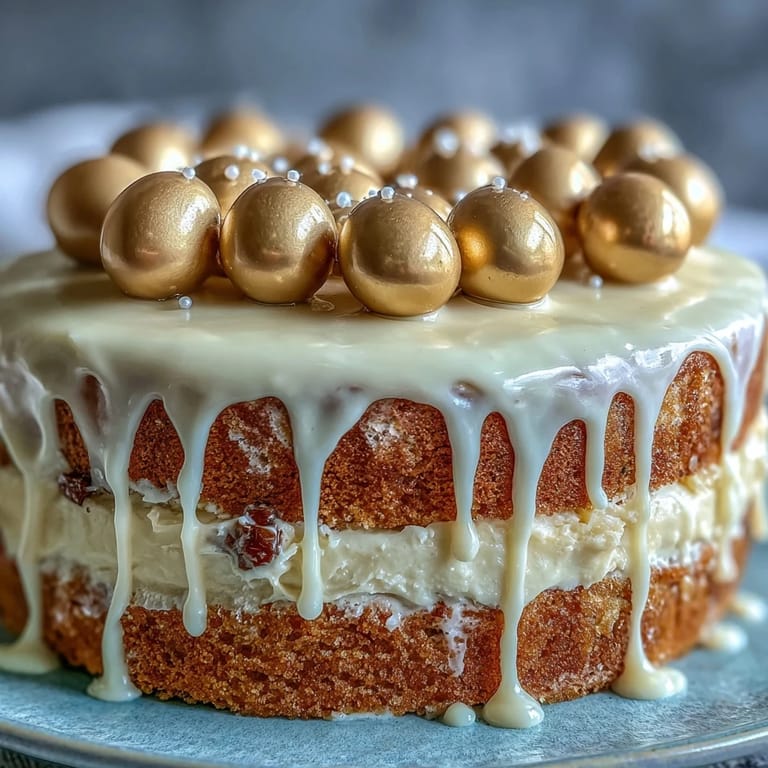
 If I could bottle the feeling of anticipation while assembling this dazzling cake, it would taste almost as sweet as the frosting. The scent of vanilla and cocoa filled my kitchen the first time I tried to pull off this graduation centerpiece—right as confetti spilled onto the counter and my playlist shifted from classics to pure celebration. Not every cake I've made has drawn gasps, but something about the glossy white chocolate drip and those glittering gold balloons made even my skeptical uncle pause and snap a photo. I didn't fully realize how much joy a dessert could bring until I watched the cake gradually transform from a humble sponge to a showstopper. There's a certain thrill in finishing with the gold balloons—the final touch before applause.
Last spring, I made this cake for my little cousin's graduation party. When we finished the golden balloons, she giggled and insisted on placing the biggest one at the center—her “main character moment,” as she called it. We each took turns adding pearls, totally ignoring the rulebook. The kitchen grew louder as friends drifted in, drawn by the chocolatey fragrance wafting from the oven. It was the only dessert that got a spontaneous standing ovation at the end.
Ingredients
- All-purpose flour: Makes the sponge sturdy but tender—always sift for lightness.
- Baking powder: Crucial for lift; double-check freshness so the layers rise evenly.
- Salt: Just enough to sharpen the vanilla without overpowering.
- Unsalted butter: Room temperature is key for creaminess; letting it soften before mixing avoids lumps.
- Granulated sugar: Cream it well with butter for that airy texture—you’ll notice it in every bite.
- Eggs: They bind and enrich; cracking them in a separate bowl prevents shell surprises.
- Vanilla extract: Real extract brings warmth—go all in, and don’t skimp.
- Whole milk: The sponge stays moist and rich; use room temp for non-curdling batter.
- Powdered sugar: Sift it for lump-free buttercream; it guarantees a smooth finish.
- White chocolate: Melt it gently—go slow, and never rush, or you might seize your chocolate.
- Heavy cream: Adds glossy richness to both buttercream and drip; it’s magic in moderation.
- White chocolate crispy pearls or malt balls: The fun “balloon” base—I've learned to spray them ahead of time so all hands are gold-free on party day.
- Edible gold spray or gold-dusted luster powder: Be generous for that gleaming effect—it holds up beautifully in photos.
- Toothpicks or thin cake wires: These let the balloons float above the cake; careful placement keeps them upright and lively.
Tired of Takeout? 🥡
Get 10 meals you can make faster than delivery arrives. Seriously.
One email. No spam. Unsubscribe anytime.
Instructions
- Prep Your Pans:
- Line and grease your cake pans—nothing is worse than a stubborn sponge. Parchment is lifesaving, trust me!
- Combine Dry Ingredients:
- Whisk flour, baking powder, and salt until airy. You'll see tiny pockets of lift forming even before baking.
- Cream Butter and Sugar:
- Beat until it looks pale and fluffy; listen for that sound of the mixer shifting from rough to silky. Add eggs one at a time and stir in vanilla for a fragrant base.
- Mix the Batter:
- Alternate dry mix and milk on low speed. It might look a little curdled but smooths out beautifully with patience.
- Bake the Sponge:
- Divide batter into pans, smooth tops, and bake. Your kitchen will smell like birthday cake times ten.
- Cool and Unmold:
- Let cakes rest for 10 minutes, then carefully turn onto racks. Cooling fully is the secret to perfect layers later.
- Make Buttercream:
- Whip butter until creamy, then add sugar and melted white chocolate. Add a splash of cream to get the texture just right.
- Assemble and Crumb Coat:
- Level the cooled cakes and layer with buttercream, finishing with a crumb coat. The chill sets it for easier decorating.
- Finish with Buttercream:
- Apply a thick final layer, smoothing edges with an offset spatula. Don't aim for perfection—the drip will hide any bumps.
- Prepare the Drip:
- Heat cream and pour over chopped chocolate, letting it melt quietly, then stir until glossy. Cool it so the drip runs just right.
- Drip and Decorate:
- Using a spoon or bottle, let the ganache trickle down the cake. Fill the top and smooth—it's oddly meditative.
- Make the Gold Balloons:
- Spray or dust crispy pearls with gold, insert wires and arrange in clusters. The more playful, the better!
- Chill and Serve:
- Let the cake chill before serving. Bring to room temp and slice in generous wedges for maximum celebration.
 Save to Pinterest
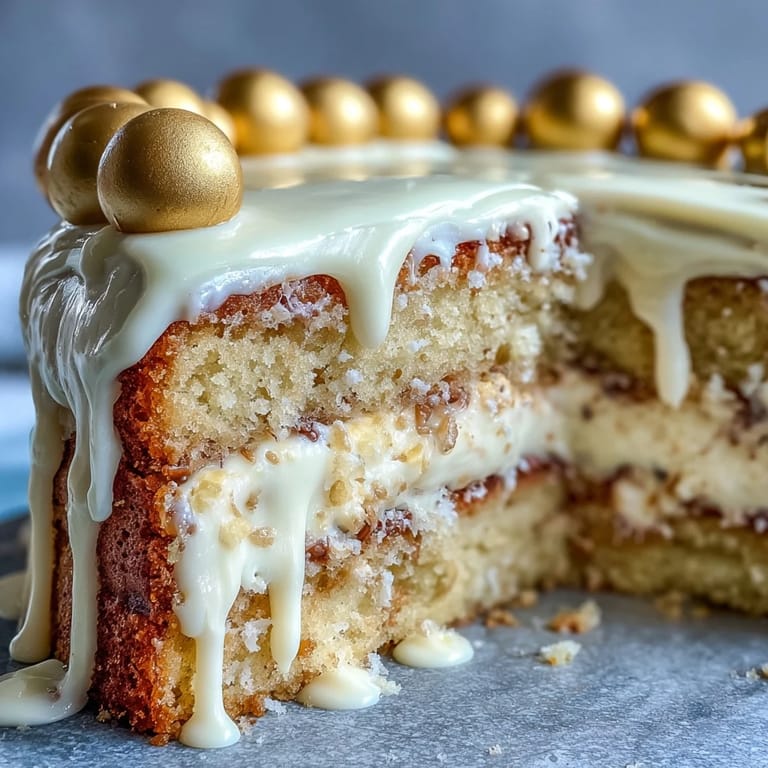
 After everyone had gone home, I found a single gold balloon left on a clean plate, glimmering in the candlelight. Clearing up, I realized this cake had woven laughter and pride right into its frosting. It became not just a dessert, but a mark of accomplishment and celebration.
Making Decorations Feel Festive
Crafting the edible balloons felt oddly therapeutic—rolling crispy pearls in gold dust and stacking them in wild, uneven clusters. It doesn't matter if they're perfectly shaped; what matters is that each one adds a burst of fun. If you're involving kids or guests, let everyone design their own cluster and watch their creativity take over. Sometimes those quirky little touches are the ones that get noticed first. The cake starts to feel more personal with every gold piece added.
On Getting the Drip Just Right
If the white chocolate ganache is too warm, the drip will pool at the bottom instead of running slowly down the sides. I learned that patience here delivers better results than any fancy equipment. A spoon works well if you prefer a freestyle drip, but a squeeze bottle gives you control for uniform lines. Don't stress over a bit of mess—imperfection is part of the celebration. Practice a drip on the side of your mixing bowl before going live.
Serving and Storage Wisdom
To make slicing easier, let the cake come to room temperature for about 30 minutes after chilling. Choose a sharp, thin knife and wipe it between cuts to keep those elegant layers clean. When storing leftovers, wrap the cake gently to protect the buttercream.
- Let flavors mellow overnight for even better texture.
- Gold dust can transfer, so watch for glittery fingerprints.
- Cakes always look fancier on a simple white plate.
 Save to Pinterest
 Even if you're not a frequent baker, this graduation cake will bring joy and a bit of sparkle to any milestone. Here's to making memories—and plenty of edible gold confetti along the way.
Common Recipe Questions
- → How do I achieve a smooth white chocolate drip?
Use finely chopped white chocolate and pour hot cream over it. Stir until smooth and cool before drizzling on chilled cake.
- → Can I make the cake ahead of time?
Yes, assemble and chill the cake up to 3 days in advance. Bring to room temperature before serving for best flavor.
- → What alternative can I use for gold balloons?
If preferred, gold-wrapped chocolate candies or gold-luster malt balls can substitute for the balloon decoration.
- → How do I ensure the sponge is tender?
Use room temperature dairy and eggs, avoid over-mixing, and bake until a toothpick comes out clean.
- → Is this cake suitable for vegetarians?
Yes, it contains no meat products and uses dairy and eggs. Always check ingredient labels if allergies are a concern.
- → Can I freeze leftovers?
Wrap individual slices tightly and freeze for up to a month. Thaw at room temperature before serving.