 Save to Pinterest
 The first time I made chicken sushi bake was a complete accident. My roommate was craving sushi, I had leftover rotisserie chicken, and honestly, I was too lazy to roll anything by hand. So I grabbed a baking dish, threw together rice and chicken with some mayo and sriracha, topped it all with cheese, and slid it into the oven. Twenty-five minutes later, something magical happened—crispy edges, creamy center, and a fusion that somehow made perfect sense. Now I make it whenever I need to feed people without stressing.
I'll never forget bringing this to a potluck where everyone was expecting something predictable. A friend took one bite and looked genuinely confused—in the best way. "Is this sushi? Is this casserole? Why is it so good?" she kept asking. That moment made me realize the beauty of this dish isn't that it's authentically Japanese or classically American. It's that it breaks the rules in exactly the right way.
Ingredients
- Sushi rice: The foundation needs to be slightly sticky but individual grains. Don't skip the rinsing—it removes excess starch and gives you the right texture.
- Rice vinegar, sugar, and salt: These three together create the subtle tang that makes sushi rice distinct. Mix them while the rice is still hot so they absorb completely.
- Cooked chicken breast: Rotisserie chicken adds incredible flavor and saves you time, but fresh poached chicken works beautifully too. Keep the pieces bite-sized.
- Japanese Kewpie mayonnaise: It's tangier and richer than regular mayo—a small upgrade that actually matters here.
- Cream cheese: Softened, it melts into the chicken mixture and creates that luxurious, creamy texture without being heavy.
- Sriracha: Start with one tablespoon, taste, and adjust. This isn't about heat; it's about adding depth.
- Soy sauce: A tablespoon ties the whole thing together with umami richness.
- Green onions: Fresh and thinly sliced, they add brightness and a slight sharpness that cuts through the richness.
- Mozzarella cheese: It melts evenly and browns beautifully, creating those golden, crispy bits everyone fights over.
- Furikake seasoning: This nori and sesame blend adds texture and an authentic sushi flavor. Sprinkle it both before and after baking.
- Avocado: Add this only after baking so it stays fresh and creamy. It's the finishing touch that brings everything together.
- Nori sheets: Toasted seaweed adds that unmistakable sushi flavor and a slight crispness. Cut it into strips or serve on the side.
- Toasted sesame seeds: A sprinkle at the end adds nuttiness and visual appeal.
Tired of Takeout? 🥡
Get 10 meals you can make faster than delivery arrives. Seriously.
One email. No spam. Unsubscribe anytime.
Instructions
- Prepare your space:
- Preheat your oven to 400°F and lightly grease a 9x9-inch baking dish. Having everything ready before you start makes the process smooth and stress-free.
- Cook the rice right:
- Rinse sushi rice under cold running water, stirring gently with your fingers until the water runs completely clear—this is important for the right texture. Add to a pot with 2½ cups water, bring to a boil, cover, and simmer for 15 minutes, then let it rest covered for 10 minutes.
- Season the rice:
- While the rice is still warm, dissolve the rice vinegar, sugar, and salt together, then gently fold into the cooked rice using a spatula or wooden spoon. The warmth helps the flavors soak in.
- Build the chicken layer:
- In a bowl, combine the cooked chicken, Kewpie mayonnaise, softened cream cheese, sriracha, soy sauce, and sliced green onions, stirring until everything is creamy and evenly mixed. Taste it—this is your chance to adjust the spice level.
- Layer and assemble:
- Spread the seasoned rice evenly across the bottom of your baking dish, then sprinkle half of the furikake over it. Layer the chicken mixture on top, spreading it into an even layer, then top with the shredded mozzarella and remaining furikake.
- Bake until golden:
- Slide it into the oven for 20–25 minutes, watching until the cheese is melted and the edges turn golden brown. You'll notice it filling your kitchen with the most incredible smell.
- Finish with fresh toppings:
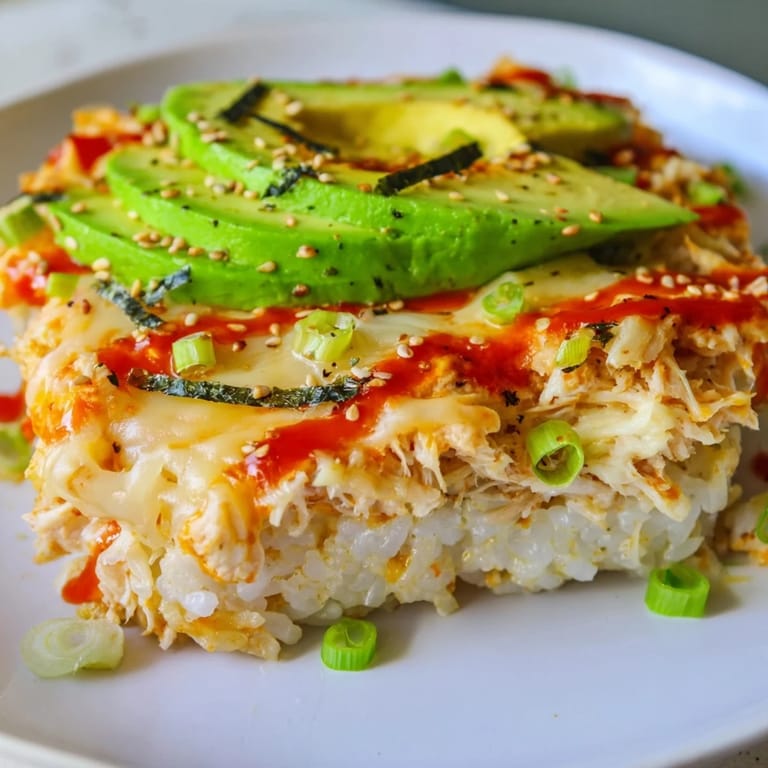
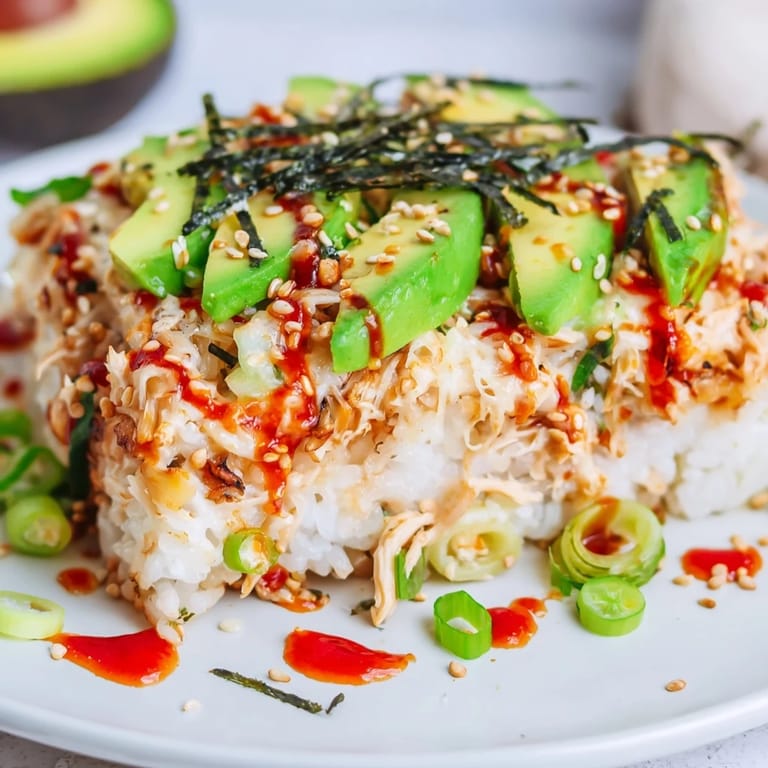
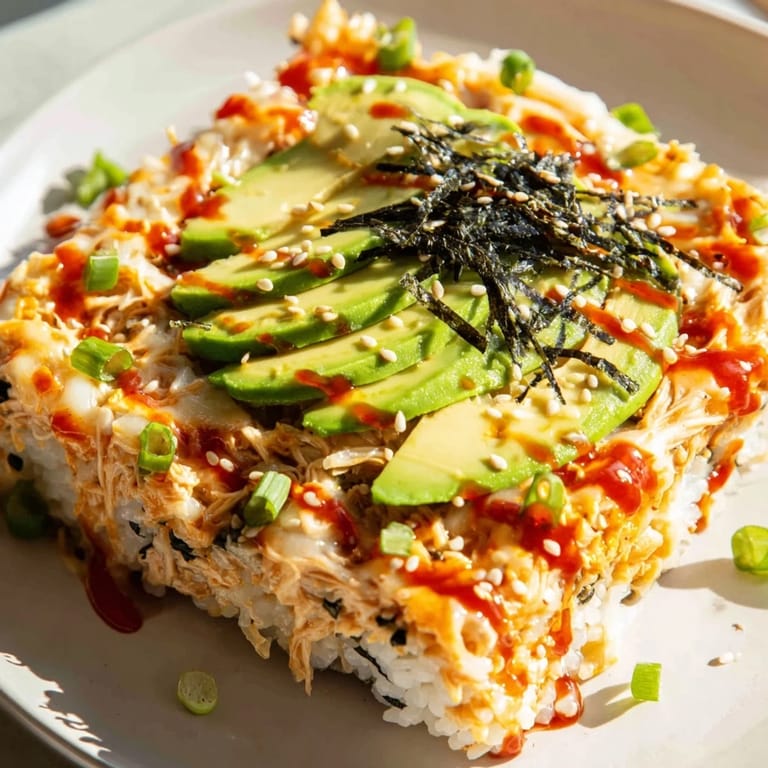
- Let it cool for just 5 minutes, then top with sliced avocado, nori strips, toasted sesame seeds, and drizzle with extra sriracha and mayo if you like. The slight coolness of the avocado against the warm casserole is the whole experience.
- Serve it right:
- Scoop generous portions onto small plates or serve on nori sheets for a fun, hand-held option. Either way, serve it warm so the cheese is still slightly melted.
 Save to Pinterest
 What I love most is watching people's faces when they take a bite and suddenly understand that comfort food doesn't need to choose between cultures or categories. It just needs to taste like someone made it with care.
Why This Recipe Works as Fusion
Fusion cooking gets a bad reputation when it's done carelessly, but this dish works because it respects both sides. The base is authentically sushi rice—properly rinsed and seasoned the traditional way. The topping honors Japanese flavors with nori, furikake, and that specific Kewpie mayo quality. But it's unapologetically baked in a casserole dish with melted cheese because that's what brings it all together into something uniquely delicious. It's not trying to be something it's not.
Building Layers of Flavor
Each ingredient in this dish has a job. The rice is your foundation—stable and slightly tangy. The chicken mixture adds creaminess and savory depth. The cheese brings richness and a golden texture. The toppings—avocado, nori, sesame—add freshness and crunch at the very end. It's a study in balance. Too much of any one thing tips the scales, but hit the ratio right and everything sings together.
Kitchen Timing and Temperature
The 45-minute total time—20 minutes prep, 25 minutes baking—is actually forgiving because so much of it is hands-off. Your oven is doing the work while you sit down. The temperature matters though; 400°F is hot enough to brown the cheese and warm everything through without drying out the chicken. If you're nervous, use a quick oven thermometer to verify.
- Start your rice first since it needs time to cook and cool slightly before seasoning.
- While the rice cooks, prep and mix your chicken layer so you're ready to assemble the moment the rice is done.
- If you're doubling the recipe, use a 9x13 dish and add just 5 more minutes to the baking time.
 Save to Pinterest
 This recipe has become my go-to for gatherings because it feels special without demanding anything of me. It's the kind of dish that brings people together, one warm, creamy, perfectly balanced bite at a time.
Common Recipe Questions
- → What type of rice is best for this dish?
Sushi rice is ideal due to its sticky texture, which helps bind the casserole and hold the layers together during baking.
- → Can I use pre-cooked chicken for convenience?
Yes, shredded rotisserie chicken works perfectly and adds extra flavor while reducing prep time.
- → How spicy is the dish and can it be adjusted?
The spice level depends on the amount of sriracha used. You can increase or reduce it to suit your heat preference.
- → What role does furikake seasoning play?
Furikake adds a savory, umami-packed crunch with hints of sesame and seaweed, enhancing the overall flavor profile.
- → Can this dish be served cold or is it best warm?
It is best enjoyed warm right after baking to appreciate the melted cheese and creamy texture, though leftovers can be eaten chilled.
- → Are there any suggested additions for freshness?
Diced cucumber or pickled ginger can be added to provide a fresh contrast to the rich, creamy layers.