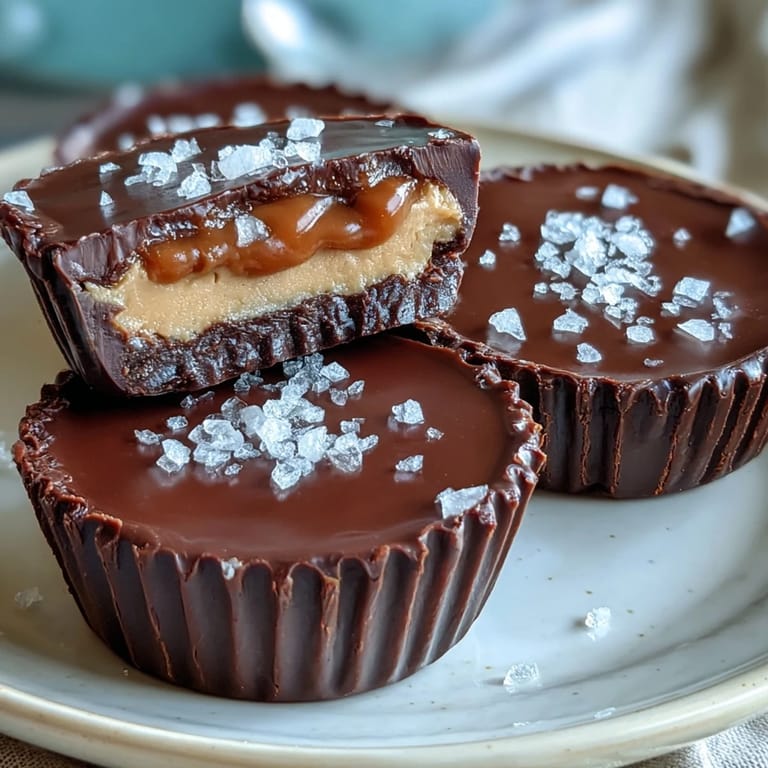
 Save to Pinterest
 My kitchen smelled like a candy factory the afternoon I first attempted homemade peanut butter cups, chocolate-melting steam rising from a bowl while my partner hovered nearby asking if we'd somehow reinvented the wheel. There's something magical about layering chocolate, peanut butter, and salted caramel into something that tastes like it came from a fancy chocolatier, except you made it with your own two hands. These aren't just sweet—they're the kind of treat that makes people pause mid-bite and ask what you did differently. Once you taste that moment when the salt hits the caramel and the chocolate snaps between your teeth, store-bought versions feel disappointingly flat.
I'll never forget bringing a batch to my book club, watching someone bite into one and immediately go quiet—that kind of quiet that means a food memory just formed. She asked for the recipe before the chocolate had even finished melting on her tongue, and I knew these were keepers. Since then, they've become my go-to gift, the dessert I make when I want to show up feeling confident.
Ingredients
- Semisweet or milk chocolate, chopped (300 g): The foundation of everything—choose chocolate you actually enjoy eating because it makes a real difference in flavor depth.
- Coconut oil or unsalted butter (2 tbsp): These thin the chocolate just enough to coat evenly without seizing, and coconut oil keeps things vegan-friendly if that matters to you.
- Creamy peanut butter (120 g): Room temperature peanut butter blends smoother and distributes the sugar more evenly.
- Powdered sugar (2 tbsp): It dissolves into the peanut butter filling, creating that silky texture without graininess.
- Unsalted butter for filling (1 tbsp, softened): This adds richness and helps bind everything together without overwhelming the peanut flavor.
- Vanilla extract (½ tsp): A small amount that rounds out the peanut butter's earthiness.
- Granulated sugar (100 g): The base for caramel—don't skip this or you'll end up with sweetened butter instead of actual caramel.
- Unsalted butter for caramel (2 tbsp): Adds that glossy richness caramel demands.
- Heavy cream (60 ml): It stops the caramel from becoming brittle and creates that luxurious pour-ability.
- Fine sea salt for caramel (¼ tsp): Dissolves into the mixture, balancing sweetness from the inside out.
- Flaky sea salt for topping: This is your finishing touch—it should be visible and slightly chunky, creating textural contrast.
Tired of Takeout? 🥡
Get 10 meals you can make faster than delivery arrives. Seriously.
One email. No spam. Unsubscribe anytime.
Instructions
- Set up your workspace:
- Line a muffin tin with 12 paper liners and have everything measured and ready before you start melting chocolate. Chocolate waits for no one, so this step prevents frantic searching while your bowls get too hot.
- Melt the chocolate gently:
- Use a double boiler or microwave in 30-second bursts, stirring between intervals until you have smooth, glossy chocolate. Overheated chocolate becomes grainy and bitter, so patience here pays off in flavor.
- Create the base layer:
- Spoon roughly a tablespoon of melted chocolate into each liner and tilt until the bottoms are coated, then freeze for 10 minutes. You're creating a chocolate shell that holds everything in place.
- Prepare the peanut butter mixture:
- Mix room-temperature peanut butter with powdered sugar, softened butter, and vanilla until completely smooth and combined. This filling should feel dense but workable, like modeling clay.
- Shape the peanut butter discs:
- Divide your mixture into 12 equal portions and press each into a flat disc roughly the same diameter as the inside of your liner. These sit directly on the chocolate base and hold the caramel.
- Make the salted caramel:
- Heat sugar in a saucepan over medium heat, swirling occasionally without stirring until it turns deep golden amber—this takes about 5 minutes and smells absolutely incredible. Add butter, stir until melted, then slowly pour in cream while whisking (it will bubble dramatically but that's normal), then stir in sea salt and let it cool for 10 minutes before using.
- Assemble each cup:
- Place a peanut butter disc on each chocolate base, add about a teaspoon of cooled caramel on top, then cover completely with remaining melted chocolate, smoothing the tops. Work gently so you don't push the caramel out.
- Add the finishing touch:
- Sprinkle a pinch of flaky sea salt on top of each cup before the chocolate fully sets—it should stick to the warm chocolate. This salt is what transforms these from good to unforgettable.
- Final chill:
- Refrigerate for at least 30 minutes until completely set and the chocolate feels snappy when you tap it. Store in an airtight container in the fridge for up to a week (though they rarely last that long).
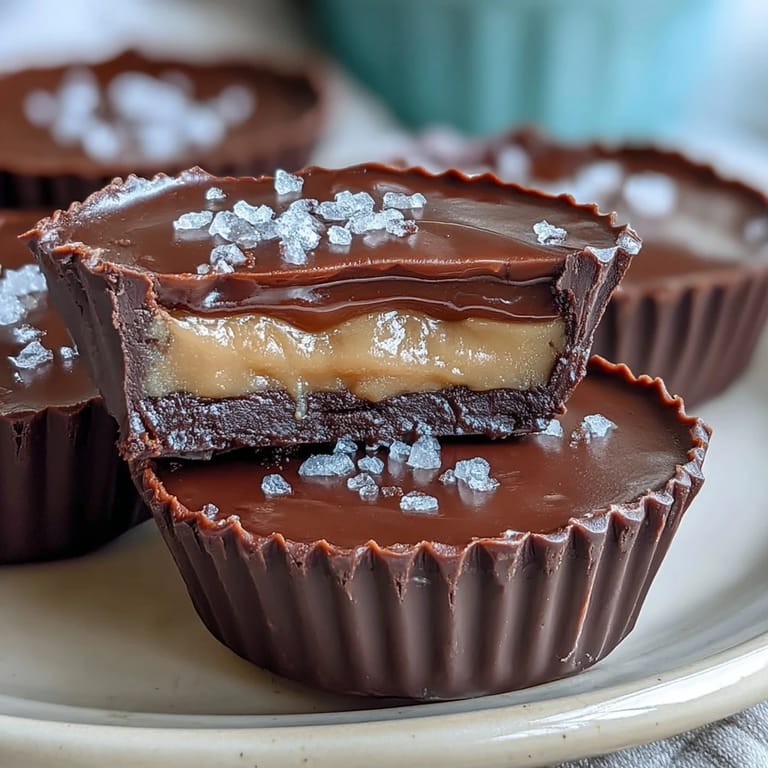 Save to Pinterest
 My mom tried one of these at my kitchen table on a random Tuesday, and she said they reminded her of a candy she loved as a kid but could never find again. Watching her face when those flavors hit was when I realized homemade food isn't really about nutrition or saving money—it's about creating moments people remember. These peanut butter cups somehow do that.
Why Salted Caramel Changes Everything
Without the caramel layer, these would just be chocolate-covered peanut butter, which is fine but forgettable. The caramel introduces this silky, complex sweetness that plays beautifully against the salt—it's the element that makes people wonder what you did differently. I learned this the hard way by making a batch without it first, and the difference was stark enough that I've never skipped this step since.
Troubleshooting Common Mistakes
Grainy caramel means you stirred the sugar instead of swirling it—you can't fix this, so start over with a clean saucepan and remember the swirl technique. If your chocolate cracks after chilling, it likely got too thick or too cold, so try melting a fresh batch with slightly more coconut oil for the next attempt. Caramel leaking out means your peanut butter discs were too thin or positioned unevenly, so press them thicker and check that they sit flat and centered on each chocolate base.
Making These Your Own
These cups are a blank canvas if you want them to be—I've experimented with almond butter for a lighter nuttiness, added a small pinch of cinnamon to the caramel for warmth, and even tried espresso powder mixed into the peanut butter. The base method stays the same, but your flavor additions can shift the entire vibe. Trust your instincts and taste as you go, since your favorite combinations might surprise you.
- Sunflower seed butter works beautifully for nut-free versions and tastes equally luxurious.
- A tiny amount of bourbon or coffee liqueur stirred into the cooled caramel adds unexpected depth.
- These freeze excellently for up to two months, so make a double batch without guilt.
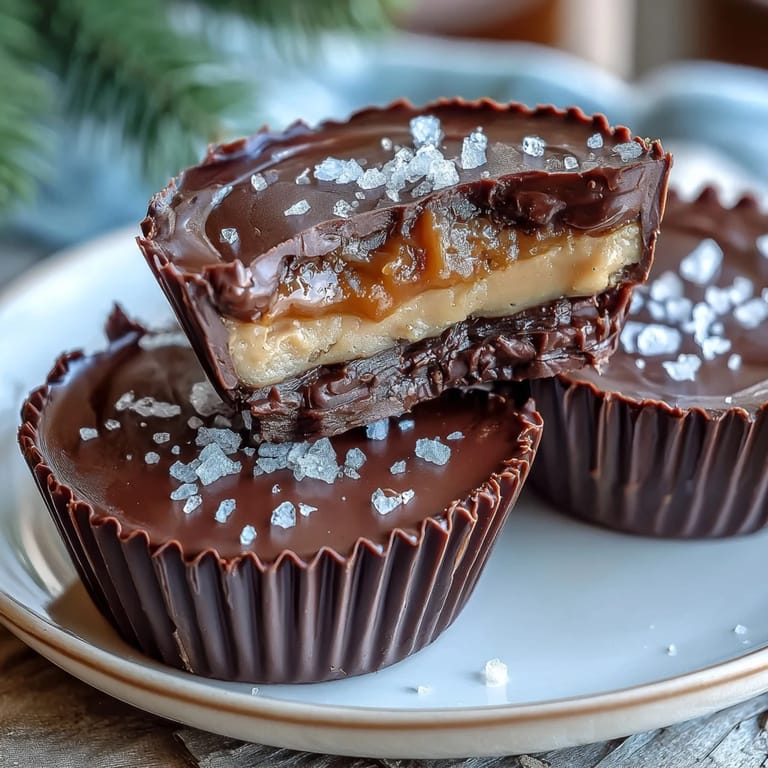 Save to Pinterest
 These homemade peanut butter cups prove that the simplest ingredients become something extraordinary when you pay attention and respect the technique. Every time someone bites into one, you're sharing something you actually made with your own hands.
Common Recipe Questions
- → What type of chocolate works best?
Semisweet or milk chocolate both melt smoothly and balance well with the peanut butter and caramel flavors.
- → Can I substitute peanut butter?
Yes, almond or sunflower seed butter can be used as nut-free alternatives without compromising texture.
- → How do I make the salted caramel?
Gently melt sugar until golden, add butter and cream while whisking, then stir in fine sea salt for a smooth sauce.
- → How long should the cups chill?
Chill the chocolate base for 10 minutes before adding fillings, then refrigerate assembled cups for at least 30 minutes to set.
- → What is a good storing method?
Keep the cups in an airtight container in the refrigerator for up to one week to maintain freshness.