 Save to Pinterest
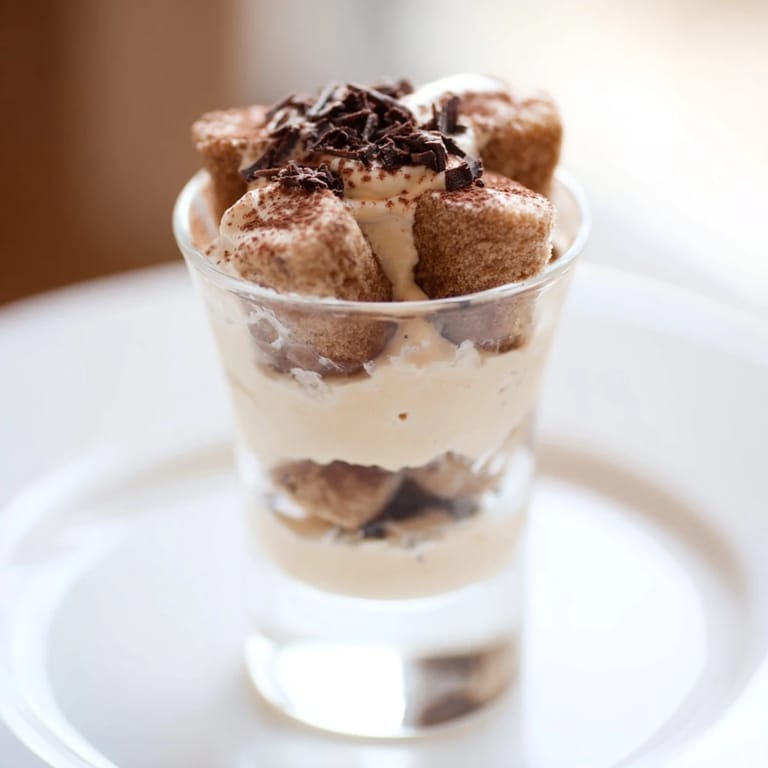
 My friend Maria texted me at 11 PM asking if I could bring something to her dinner party starting in two hours, and instead of panicking, I found myself pulling out espresso cups and shot glasses. I'd never made tiramisu in this format before, but the idea hit me all at once—why not bottle the whole experience into something you could pass around? The layered elegance of tiramisu felt too good to keep confined to a big pan, and honestly, there's something magical about serving a deconstructed version that lets people experience each flavor separately before it all comes together.
When I finally arrived at Maria's with eight little shot glasses lined up in a cardboard box, the moment I set them on her kitchen counter, three people immediately crowded around asking what they were. That's when I realized this format was doing something special—it transformed tiramisu from a dessert into a conversation piece, something worth lingering over instead of just scooping onto a plate.
Ingredients
- Ladyfinger biscuits (savoiardi): These are the foundation, and their slight sponginess is exactly what makes them perfect for absorbing the espresso without turning to mush. Break them into bite-sized pieces so they nestle comfortably in the shot glass.
- Freshly brewed espresso, cooled: Use espresso that's actually strong and fresh—instant coffee or weak brew will leave your shots tasting flat and forgettable.
- Coffee liqueur: Kahlúa or Tia Maria adds a subtle sweetness and depth that reminds you this is a treat, not just coffee dessert.
- Mascarpone cheese, room temperature: This is critical because cold mascarpone clumps when you try to mix it. Let it sit on the counter for 30 minutes before you start.
- Heavy cream, cold: The contrast between cold cream and room temperature mascarpone creates that perfect texture—whipped cream lifts everything and keeps the layers cloud-like.
- Powdered sugar: Just enough to sweeten without making this cloying. Taste as you go.
- Vanilla extract: A whisper of vanilla ties all the flavors together so nothing feels sharp or one-note.
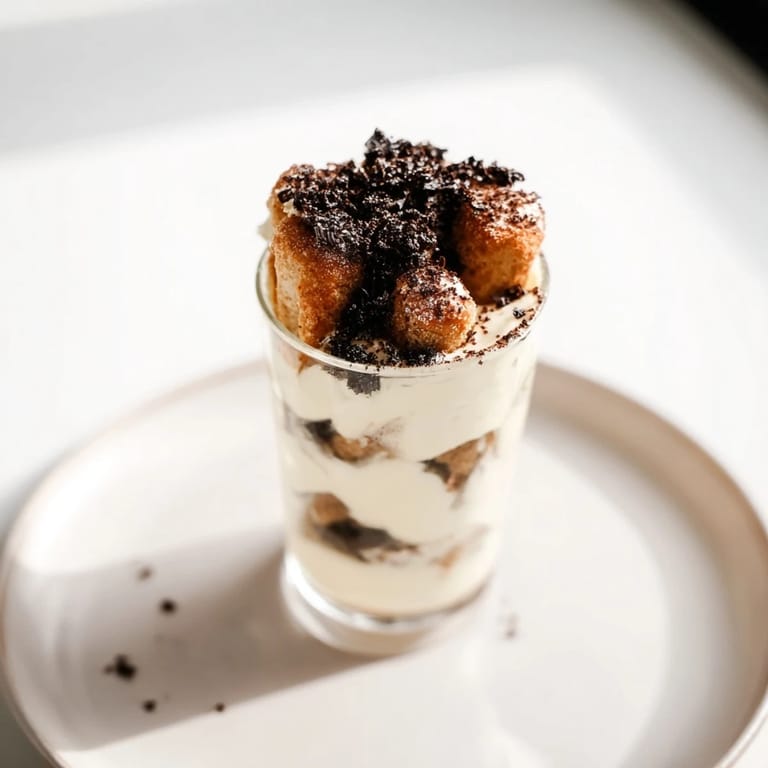
- Unsweetened cocoa powder: Don't skip this final dusting—it's your visual signal that this is tiramisu, and it delivers an earthy punch right at the end.
Tired of Takeout? 🥡
Get 10 meals you can make faster than delivery arrives. Seriously.
One email. No spam. Unsubscribe anytime.
Instructions
- Combine the espresso and liqueur:
- Pour your cooled espresso into a shallow bowl and stir in the coffee liqueur, letting the flavors meld for a moment. This mixture is your secret weapon—it's what makes these shots taste like real tiramisu instead of just sweetened coffee and cream.
- Dip the biscuits briefly:
- One by one, dunk each ladyfinger piece into the espresso mixture for just a second or two. You want them kissed by the coffee, not dripping wet. This is the move I get wrong the first time every single time, so trust that instant where you think it's not enough—it's exactly enough.
- Whisk the mascarpone base:
- In a medium bowl, whisk together mascarpone, powdered sugar, and vanilla until the mixture becomes smooth and there are no lumps hiding in the corners. This takes longer than you'd think, so don't rush it.
- Whip the heavy cream:
- In a separate bowl, whip the cold cream until it forms soft peaks, then gently fold it into the mascarpone mixture using a spatula. The goal is to keep everything light and airy, so fold slowly and only until combined.
- Layer the biscuits:
- Place a single layer of espresso-soaked ladyfinger pieces at the bottom of each shot glass. It'll look modest, but that's exactly right.
- Add the cream layer:
- Spoon or pipe the mascarpone cream mixture over the biscuits, smoothing it out so it's relatively even. If you have a piping bag, this is where it makes your life easier, but a spoon works fine too.
- Repeat the layers:
- Add another layer of soaked biscuits, then top with another layer of mascarpone cream. You're building something that looks deliberate and beautiful.
- Dust and garnish:
- Right before serving, dust each shot glass generously with cocoa powder using a fine sieve for even coverage. Add dark chocolate shavings if you're feeling fancy, but honestly the cocoa is the perfect finish.
- Chill before serving:
- Refrigerate for at least an hour so the flavors settle and the layers become distinct. You can make these up to 8 hours ahead, which is exactly why they're perfect for parties.
 Save to Pinterest
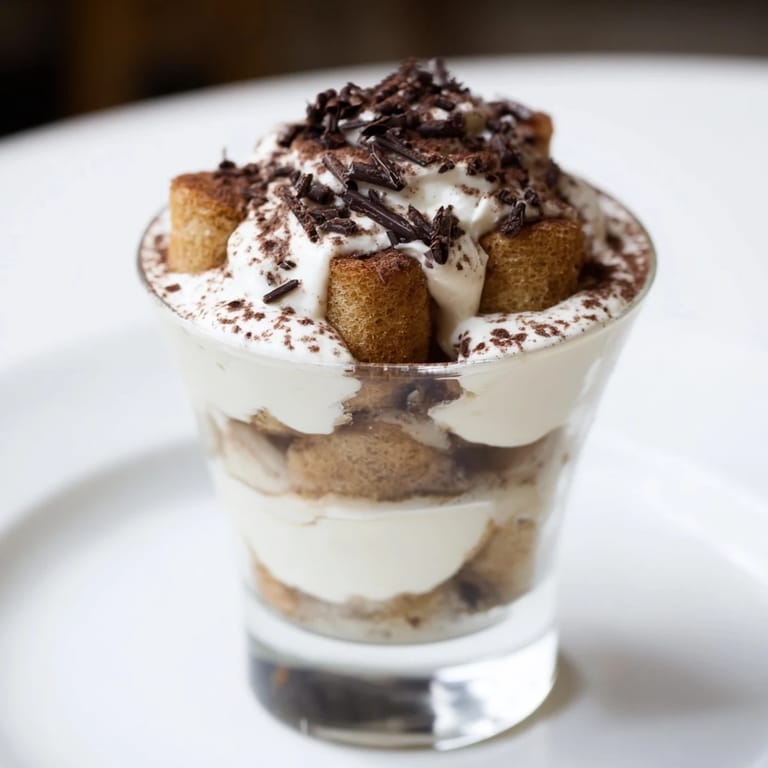
 At Maria's party, I watched people pick up these little shot glasses with genuine surprise and curiosity, and something shifted in the room. Dessert went from an afterthought to an event, a moment where everyone paused and actually tasted what they were eating instead of just finishing a plate. That's when I knew this format was more than just clever—it was honest.
Why This Format Works
Shot glasses changed how this dessert lands on the tongue and in the mind. When you eat tiramisu from a regular plate, the layers blur together, and you experience it all at once. Here, you get each flavor distinctly—first the coffee-soaked crunch, then the velvety sweetness of the cream, then the final dusting of cocoa bringing everything back to earth. It's theatrical without trying to be.
The Mascarpone Moment
Mascarpone is a finicky ingredient if you don't know its moods. It wants to be treated gently, folded rather than beaten, and given time to reach room temperature so it stays smooth and cohesive. Once you respect that, it becomes this incredible vehicle for flavor—creamy, slightly sweet, and completely forgiving when paired with coffee and sugar. The moment your whisk glides through it without resistance, you know you've got it right.
Making These Ahead and Scaling Up
One of the best things about this recipe is how cleanly it scales. The ratios stay the same whether you're making 8 shots or 24, and you can prep everything the morning of your event, then assemble in the final hour. I've learned to set up an assembly line when I'm doing a crowd—one person dipping biscuits, one layering, one dusting—and it becomes almost meditative. These shots keep beautifully in the fridge for up to 8 hours, which means you can make them the day before if you want, and they just get better as the flavors meld.
- If you're scaling up, mix your mascarpone cream in larger batches but fold in the whipped cream in smaller portions so you don't deflate it all at once.
- For non-alcoholic versions, simply skip the liqueur and increase the espresso amount slightly for deeper coffee flavor.
- Cocoa powder dusting should happen as close to serving as possible so it stays visible and doesn't get absorbed into the cream.
 Save to Pinterest
 These little shots taught me that sometimes the best way to honor a classic is to step back and reimagine it, to ask what would happen if you stripped away expectations and just focused on what makes the dish worth eating in the first place. Serve these with espresso or a glass of Vin Santo, and watch how quickly they disappear.
Common Recipe Questions
- → What type of biscuits are used in this dessert?
Ladyfinger biscuits (savoiardi) are used, broken into bite-sized pieces and lightly dipped in espresso and coffee liqueur.
- → Can I omit the alcohol component?
Yes, simply replace the liqueur with extra espresso for a non-alcoholic version that retains full flavor.
- → How is the mascarpone cream prepared?
Mascarpone cheese is combined with powdered sugar and vanilla, then folded with softly whipped heavy cream for a smooth texture.
- → What’s the best way to serve these shots?
Assemble layers in shot glasses, chill for at least an hour, and finish with a dusting of cocoa powder and optional chocolate shavings before serving.
- → Are there any substitution options for dietary needs?
Sponge cake or gluten-free biscuits can replace ladyfingers, accommodating gluten sensitivities without altering the layered concept.