 Save to Pinterest
 There's something magical about turning simple chocolate bars into tiny edible trees. I discovered this technique by accident one December while hunting for last-minute desserts for a holiday potluck, and what started as a desperate improvisation became the recipe I get asked for every winter. The beauty is in the simplicity—no baking, no complicated techniques, just stacking, drizzling, and watching something festive come together in your hands.
My nephew once grabbed three stacked bars before the chocolate even set and declared them the best trees he'd ever made, chocolate dripping down his chin and all. That moment reminded me why I love this recipe so much—it's the kind of thing that makes people genuinely happy, especially when they've had a hand in creating it.
Ingredients
- 24 mini Kinder chocolate bars: These become your tree bodies; their individual wrapping makes them easy to handle and they melt at just the right temperature when you drizzle chocolate over them.
- 150 g dark or milk chocolate, chopped: This is your glue and your garnish—chop it small so it melts evenly and creates those beautiful drizzled branches.
- 1 tsp coconut oil (optional): A tiny amount makes your chocolate flow like silk; skip it if you prefer thicker drizzles that hold their shape better.
- 3 tbsp festive sprinkles or edible glitter: Add these while the chocolate is still wet, or they'll slide right off—the shimmer is what makes these feel genuinely festive.
- 8 mini chocolate stars or candy stars: These toppers anchor each tree and give you a clear stopping point for decoration.
Tired of Takeout? 🥡
Get 10 meals you can make faster than delivery arrives. Seriously.
One email. No spam. Unsubscribe anytime.
Instructions
- Line your workspace:
- Cover a baking tray with parchment paper, giving yourself room to work without things sticking or sliding around.
- Unwrap and stack:
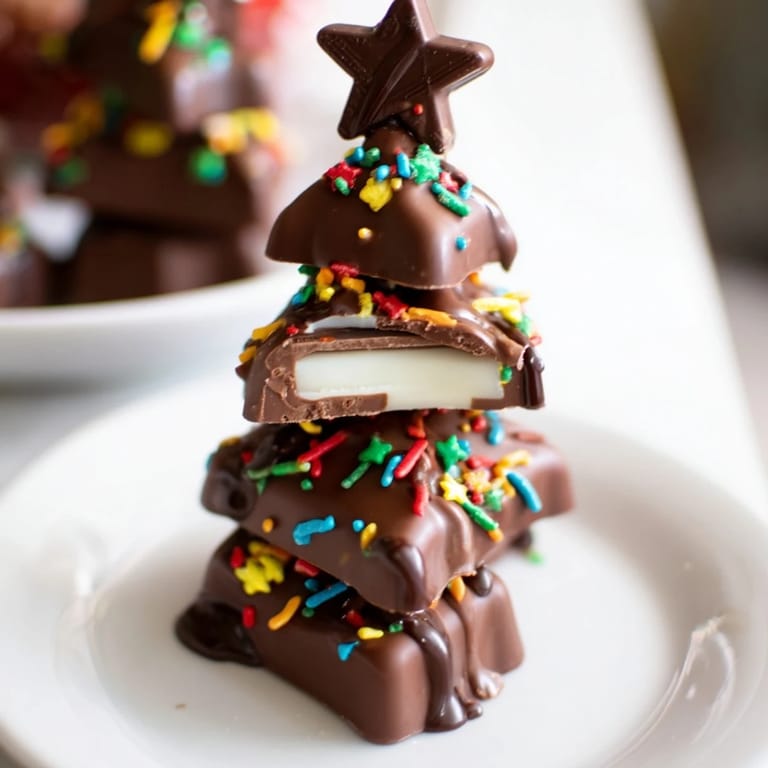
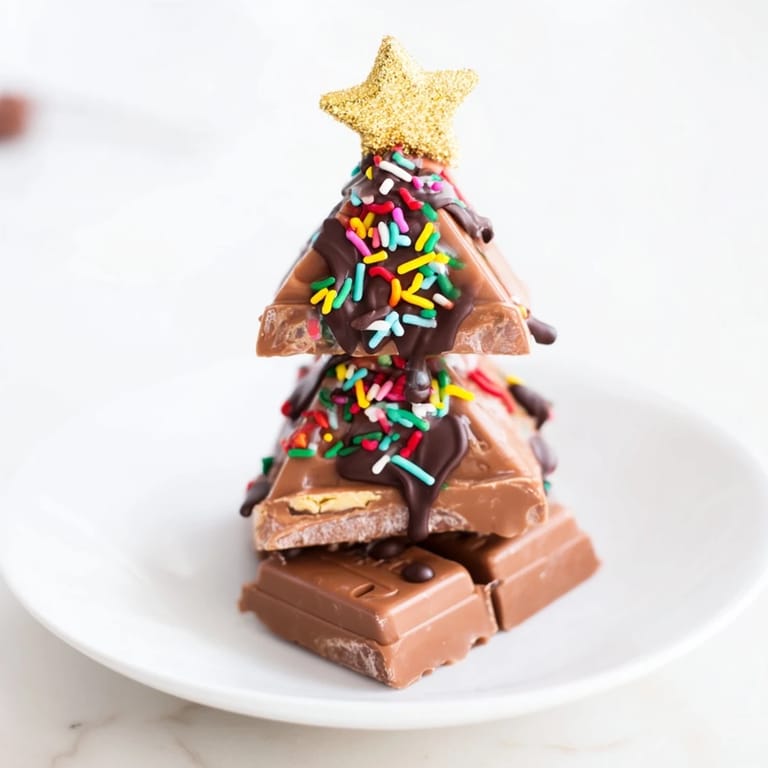
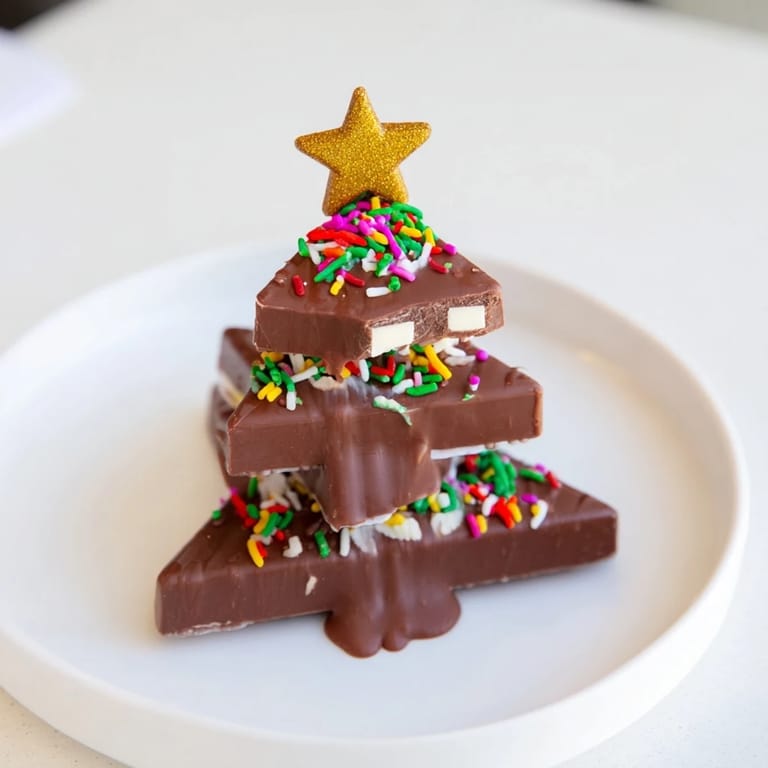
- Unwrap all your Kinder bars and arrange them into tree shapes—typically one whole bar as the base, one broken in half and overlapped to form a triangle in the middle, and another piece on top. Trust your instincts here; there's no single right way, which is part of the fun.
- Arrange on the tray:
- Space your stacked trees a few inches apart so you have room to move between them with your drizzle.
- Melt your chocolate:
- Either use a double boiler (heatproof bowl over simmering water) or microwave in 20-second bursts, stirring between each burst until completely smooth. Watch it carefully—chocolate can go from glossy to grainy in seconds.
- Drizzle generously:
- Use a spoon or piping bag to create sweeping drizzles over each tree stack, letting chocolate catch on the edges and create that branchy look. Work quickly but don't stress about perfection.
- Add the festive touch:
- While the chocolate is still wet, scatter sprinkles or glitter over each tree and crown it with a star before everything sets. The chocolate acts as glue here.
- Chill until set:
- Refrigerate for 10–15 minutes until the chocolate hardens completely.
- Serve:
- They're beautiful chilled straight from the fridge, but they're equally good at room temperature once they've set.
 Save to Pinterest
 The first time someone told me these were their favorite thing I'd ever made, they'd brought their own kids to help assemble them in my kitchen. We filled the whole afternoon with laughter and chocolate-covered fingers, and that's when I realized this recipe had become something beyond just food—it's an excuse to gather and create something pretty together.
Choosing Your Chocolate
Dark chocolate creates a sophisticated contrast against the sweetness of the Kinder bars and looks dramatic when drizzled. Milk chocolate plays up the sweetness and creates a warmer, more cohesive look. White chocolate brings elegance but shows every drip and smudge, so handle it with confidence or stick with darker varieties if you're nervous. The chocolate you choose should be something you actually want to eat—this isn't the place to use chocolate you don't love.
Making It Your Own
You're not locked into Kinder bars; any mini chocolate bar with a sturdy enough structure will work beautifully. I've used small chocolate rectangles, and once someone brought individually wrapped chocolate squares that stacked like bricks. The shape matters less than the structure—you want bars that won't collapse when you stack them. Similarly, your decorations can be whatever feels festive to you; crushed candy canes, mini marshmallows, or even a dusting of edible gold all create different moods and flavors.
Storage and Timing
These keep beautifully in an airtight container in a cool place for up to a week, though they rarely last that long once people know about them. Make them the morning of your gathering so the chocolate stays glossy and set, but not so far ahead that they become a temptation sitting in your kitchen. Room temperature is genuinely fine for serving despite what your instincts might say—the chocolate doesn't need to be cold to taste incredible.
- Store in layers with parchment between each tree so they don't stick together.
- Keep them away from direct heat or warm rooms, where the chocolate might soften.
- Make extra—people always want to take one home.
 Save to Pinterest
 These little trees have a way of bringing genuine joy to holiday tables without demanding much from you. Make a batch, share them proudly, and watch people's faces light up.
Common Recipe Questions
- → Can I use different chocolates for the drizzle?
Yes, white, milk, or dark chocolate can be used for the drizzle depending on your taste preference.
- → What’s the best way to melt the chocolate?
Gently melt chocolate with coconut oil over simmering water or in short microwave bursts, stirring frequently for smooth texture.
- → How do I achieve the tree shape with the bars?
Stack one whole bar, overlay a broken half to form a triangle, then add another bar on top for height to mimic a tree shape.
- → Can children participate in making these treats?
Absolutely, kids can help unwrap, stack the bars, drizzle chocolate, and add decorations under supervision.
- → How should I store these chocolate trees?
Store in an airtight container in a cool place; they remain fresh for up to one week.